Git Commands that can come in handy

You may be using Git for a long time or new to it. But, today I am going to introduce you to Git Log and Git Remote commands which might come very useful in your day to day interaction with the Git and can make your life pretty simple.

But first, you need to know the difference between Git and Github.

Git is Version Control System.

GitHub is a web-based service for version control using Git.

In easy words…

Git helps us to keep track of our files and any changes made to those files on our local machine.

Github is a website that contains source code in different repositories managed through Git

Alright now, let’s get started with Git Log

Git Log

Shows the commit logs.

Functions

  • It allows us to keep track of our works.
  • This command helps give context and history for a repository.
  • It let users customize the formatting of each commit output of the log.
  • It also lets users filter commits in the log output.

Let us explore some options that can be helpful with Git Log command:

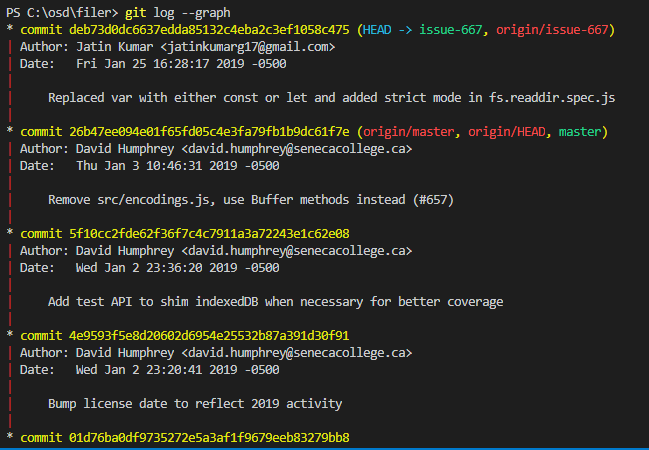
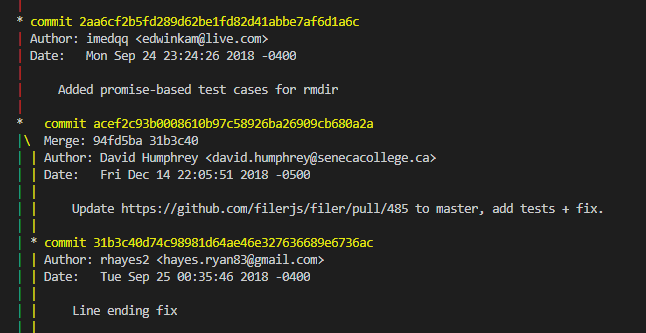
Draws a text-based graphical representation of the commit history on the left-hand side of the output.

git log --graph

Here is an example of the log output with –graph keyword.

(The output is a big list, not just five commits) As shown in the above image, the “git log –graph” retrieved the commit history on the branch (issue-667) of the filer project.
(The list continues) As shown in the above image, the “–graph” shows you previous merge represented by a different color for each branch.

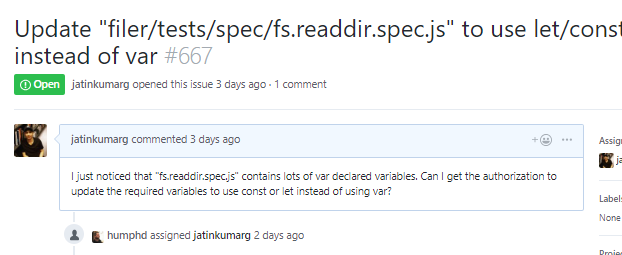
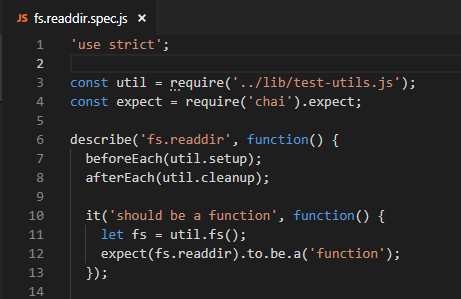
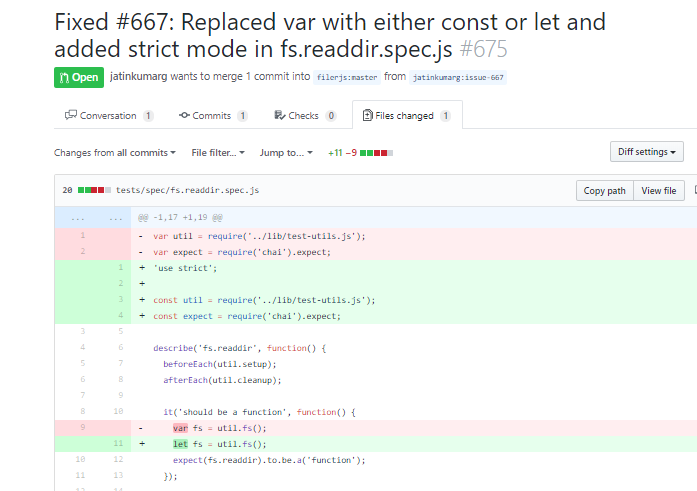
Link to view my pull request. Also, check out my previous post to know more.

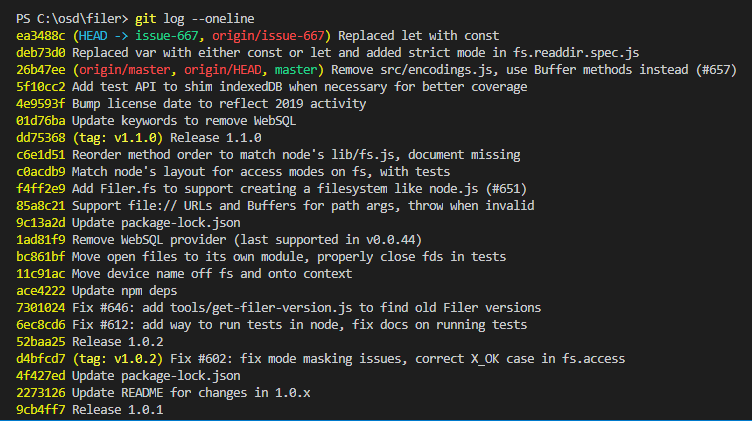
The standard “git log” command isn’t very terminal friendly as it displays lots of text. So, if you want to view commit history with only commit message then, oneline can be very convenient.

As shown in the above image, with “–online” shows the commit history with just commit message.

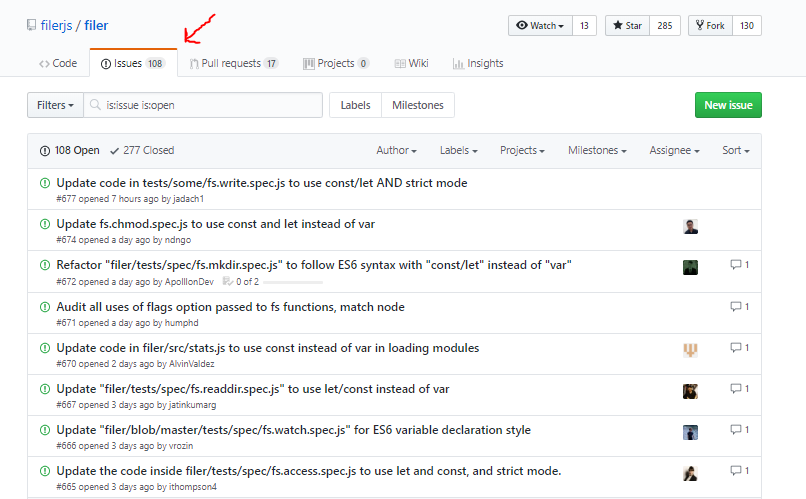
To filter commits by their commit message


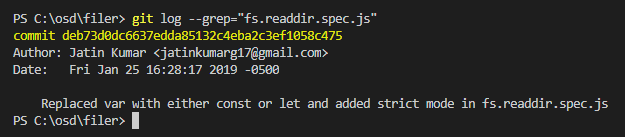
As shown in the above image, with “–grep” shows only those commits which include “fs.readdir.spec.js” in their commit message.

Click on this link to know other options of Git Log.

Git Remote

This Git command is used to manage your Central servers for hosting your git repositories.

Function

  • It lets you create, view, and delete connections to other repositories.
  • This command is also responsible for syncing change.
  • The git remote command is essentially an interface for managing a list of remote entries that are stored in the repository’s ./.git/config file.
Using git remote to connect other repositories

For example, the above diagram shows two remote connections from your repo into the central repo and another developer’s repo. Instead of referencing them by their full URLs, you can pass the origin and john shortcuts to other Git commands. (Source)
git remote

This command shows the list of all remote connections you have to other repositories.

To add a connection to John’s repo

git remote add john http://dev.example.com/john.git

To remove John’s connection

git remote rm john

It has only one option i.e.

git remote -v

This command shows the list of all remote connections you have to other repositories with the URL of each remote connection.

Sample output(Source)

git remote -v
origin  git@bitbucket.com:origin_user/reponame.git (fetch)
origin  git@bitbucket.com:origin_user/reponame.git (push)
upstream  https://bitbucket.com/upstream_user/reponame.git (fetch)
upstream  https://bitbucket.com/upstream_user/reponame.git (push)
other_users_repo  https://bitbucket.com/other_users_repo/reponame  (fetch)
other_users_repo  https://bitbucket.com/other_users_repo/reponame  (push)

Official Documentation links

Git Log

Git Remote

Some Cool Videos

Check out this video to learn some cool tricks with git-log

This is the best video if you want to become master of Git remote

Advertisement

My First Open Source Contribution Experience


Photo by Finn Hackshaw on Unsplash

This week I got an opportunity to work on Filer web filesystem project. Check out this link to know more about the project.

Throughout the whole time, I got hands-on experience on both Github and Git.

At first, I was confused between Git and Github.

Later, I found out…

Git is Version Control System.

GitHub is a web-based service for version control using Git.

In easy words…

Git helps us to keep track of our files and any changes made to those files on our local machine.

Github is a website that contains source code in different repositories managed through Git.

You can install Git through this link. Also, you need a GitHub account in order to make a contribution to any Open Source Project on GitHub.

How can I contribute to Open Source Society?

Well, there are so many ways……

Now, I am going to show you how I contributed to the Filer project on the GitHub

1) Firstly, I navigated to the Filer project on the GitHub.

2) Then, I forked the project by clicking on the button as shown in the image below

By forking, GitHub created a repository under my GitHub account.

3) After forking, I cloned the filer project on my local machine.

To clone the project click on the green button “Clone or download” and copy the link. You can either use a “Clone with SSH” or “Clone with HTTPS”.

Tip - Use "clone with ssh" to save your time in the future. With  ssh, you don't have to input your GitHub credentials and other details later when creating a pull request. But beforehand, you need to set-up an ssh key. Refer to this link to set up an ssh key. 

4) I opened my code editor (Visual Studio Code) and created a repository on my local machine by using git clone command shown below

git clone git@github.com:jatinkumarg/filer.git

5) After the cloning, I used “npm test” to make sure everything installed properly.

6) Now, it was time to either find a good bug or issue a bug.

You can find lots of bugs under the “Issues” tab.

I decided to file an issue.

So, I browsed around the code for some time and then I found files in which some of the variables use “var” as a data type which quite outdated. According to ES6 declaration style, “let” and “const” should be used to declare any variable in JS. Refer to this link to know more about ES6 declaration style.

7) Since it was my first time reporting a bug on GitHub so I just chose one file i.e. fs.readdir.spec.js filing for the issue.


Link of my issue page.

Soon I was assigned to fix the issue.

Now, It was time to code

8) I opened the earlier cloned project on Visual Studio Code and opened the fs.readdir.spec and changed the “var” declared variables with either “const” and “let” as shown below

9) After the required changes, I again executed “npm test” to check the code.

10) I used “git add” to stage the changes

git add fs.readdir.spec.js

Then,

git commit -m "Fixed #667: Replaced var with either const or let and added strict mode in fs.readdir.spec.js"

And later,

git push origin issue 667

It generated a link through which I was able to create a pull request for the filer project.

Link of my pull request.

Almost done,

After pull request, GitHub generated a CodeCov Report using Travis CI.

Luckily, I passed all the checks with 86.71% coverage.

You can review my changes through the “Files changes” tab. (link)

Red lines represent lines before changes and green lines represent after changes.

In the end, I reviewed other developer’s pull request.

Review 1

Review 2

Review 3

Conclusion

While reviewing (Review 1) pull request I found one of the contributors recommended to use ‘use strict’ at the top of the file. Then I found ‘use strict’ prevent certain actions from being taken and catches any thrown exceptions. (link) So, I added the ‘use strict’ at the top of the “fs.readdir.spec.js”. And, recommended other developers to add ‘use strict’ at the top of their file(Review 3).

Also through (Review 2), I found ‘const’ is more preferred over ‘let’ when variables aren’t changing their values. So, I changed variables declared with ‘let’ to use ‘const’ in “fs.readdir.spec.js”.

There were a few times when I was lost during the process of creating a pull request on GitHub but anyhow I figured it out through quick Google searches.

Tip - Listen to music while doing reasearch on Google (Really helps!)

In the future, I will ask my fellow developers for assistance to save some time.

Overall, I really enjoyed the whole process and I am looking forward to contributing more to the Open Source Society in the future.